
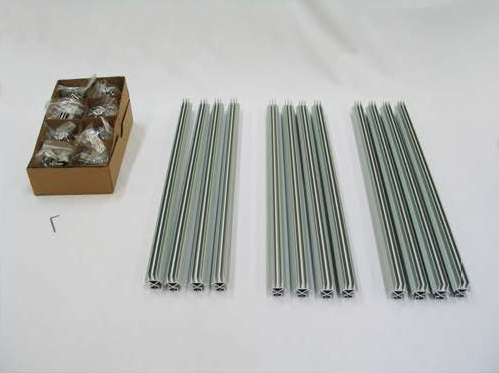
This guide will provide you with the knowledge required to assemble our TexFrame 3D Cubes - in this instance we'll be using a 700mm x 700mm x 700mm cube to demonstrate this.
When you purchase a TexFrame system from us all that you need will be supplied! For each cube display there will be:
- 12 x 3D extrusion lengths (cut to the size you require)
- 8 x 3D extrusion corners
- 1 x alen key
|
Step 1: To begin; lay out one side of the cube as we have done. |
 |
|
It's worth noting that the corners and the straight lengths can only be assembled one way. |
 |
|
Step 2: Slide the corners into a section of the extrusion, use the supplied alen key to tighten the grubs. (Each join has 2 grubs that need to be tightened.) |
 |
|
Step 3: Repeat the above step for the opposite end of the same piece of extrusion, so that you have formed a U shape. |
 |
|
Step 4: Attach the two remaining corners to the last piece of extrusion.
Step 5: Once they are attached slide both corners into the U shape & tighten the grubs to complete the side. |
 |
|
Step 6: Repeat the above process to complete the second side of the cube. |
 |
|
Step 7: Attach the remaining 4 pieces of extrusion to the corners, tightening all grubs as you go. |
 |
|
Step 8: Take the second, completed, side and attach its corners to the vertical pieces of extrusion. Again, tightening all grubs. You've made a cube! |
 |
 Posted by
William Qian
Posted by
William Qian
William Qian is a Specialist in Exhibition Graphics & Displays, and founder of ADI Displays with a vision in taking creativity through to visual reality.
From humble beginnings, he adopted the latest digital printing technology of its time, producing large format digital printing used for exhibition graphics and portable display systems.
With his love of the creative visual industry, he has established BANNERAD™ Range of Products to accommodate the growing needs of portable display solutions which have been successfully distributed in the sign and display industries.
“It is our focus and innovation that allows our continued success in meeting our customers’ display needs concerning application, preference and budget.”
